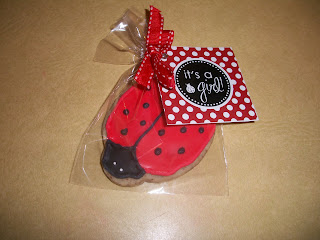
 Happy Weekend Blog Friends! Last night I finished my first ever hired-cookie-job. A friend of mine is hosting a baby shower tomorrow and asked me to make her lady bug cookies for the favors. I was pumped to have a paid cookie job, and excited for a challenging project.
  My client (hehe, I have a client) asked for sugar cookies, and we decided to jazz them up with chocolate shavings inside the dough. I used my standard recipe and added about 1/3 cup of grated semi sweet chocolate when I mixed in the flour. Then I rolled out the dough and cute out the cookies with a lady bug shaped cookie cutter.
 Yum. For elaborately decorated cookies like these, its best to use a royal icing recipe. royal icing used to be (and sometimes still is) made with egg whites, which gives the icing a shiny, smooth look after it dries. It also dries completely hard which is great for these kinds of cookies, they won't smudge, chip etc...
Nowadays Royal Icing can be made with Meringue Powder, instead of egg whites, for those who have salmonella concerns. I went with the powder.
 In a large mixing bowl, mix 3 tablespoons Meringue powder, 1/2 teaspoon cream of tartar, and 3 cups of powdered sugar until evenly blended. Add in 1 tsp vanilla, and 1/2 cup of warm water. Mix slowly at first until e well blended, then beat on high for 5 minutes or so until it's firm.
 With royal icing, it's best to use gel food coloring, the regular food coloring will give you pastel like shades, and it's tough to get the true color. It's messy though, beware.
 Then I watered down half of the icing for a "flooding" consistency. Basically the idea is you draw the borders of your designs with the thick frosting, then flood the middle with the liquidy frosting so you get a clean, smooth finish when it dries....
 Then I added little white non pareils for eyeballs. Next up was the red outlines and filler. Below is a "red progression" from outline, to flooding, to the final effect. I used a tooth pick to push the flood frosting up against the outside line and to smooth it out.


Those are adorable!
ReplyDelete